A write-protected SD card/hard disk allows you to access the data saved within it, but you can’t write/paste the new files & folders, that makes the drive unusable. However, to make it usable again, you should remove write protection from hard drive. Thus, if you want to do so, keep on reading this post. In this write-up, I have explained how to remove write protection from hard drive using command prompt or other effective solutions.
Free Hard Drive Data Recovery Tool.
Recover data from USB drives, Pen drives, SSDs, HDDs, and other devices on Windows. Try now!
Why Is My Hard Drive Write-Protected?
The data storage media like SD cards, USB drives, and other internal or external disks might get write-protected because of the following factors:
- If a physical switch of a USB drive/SD card is on a Lockside.
- Hard disk corruption
- The disk is set to Read-only mode
- Due to bad sectors
- Encrypted disk drive
- Alteration in permissions or registry by a user.
How to Remove Write Protection from Hard Drive Windows 11/10?
When it comes to remove write protection from internal & external hard drive in Windows 10/8/7, you can follow the methods mentioned below:
Method 1- Check Physical Switch of the Disk
The very first method that you should try to remove the write protection on SD card or USB drive is to inspect the physical switch of the device.
If the SD card/flash drive’s physical switch is in a locked position, it is likely the drive becomes write-protected. In that case, you have to locate the physical switch & turn it ON (if already OFF) on your SD card or USB.
Now, check if a write-protected issue disappears.
Method 2- Disable Write Protection With Regedit Option
Try to modify the Registry Information to remove the hard disk write protected with Regedit.exe. And, to do so, you need to operate the below steps:
- First of all, you can connect the disk is write protected external hard drive with Windows PC.
- Now, you need to click on the option “Start” and then open Run dialog and then you have to type there Regedit and after that, you need to hit the “Enter” key so that it can open the “Registry”.

- Now, you are required to click on the option “HKEY_LOCAL_MACHINE” and then Expand “System”.
- After this, click on the option “Current Control Set” you find in the System list and then click on the option “Control”.
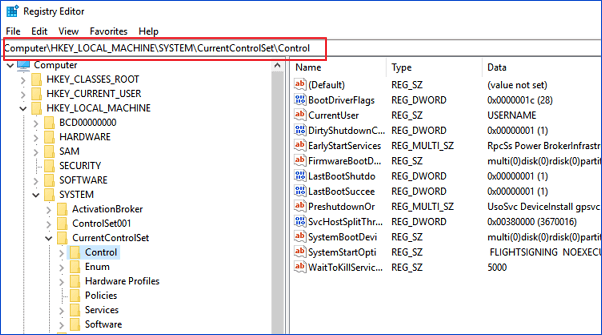
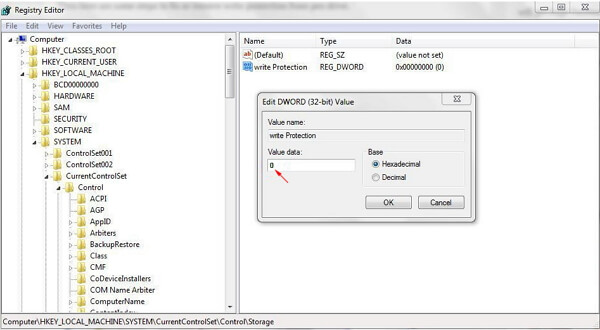
- Next, you have to check the option “Storage Device Policies” and then change the digit in the DWORD value box into 0 and then simply click on “OK” option so that you can save the changes.
- In the last step, you have to exit Regedit and then reboot the Windows system to keep all the changes.
Note: Performing any wrong operation with the registry may remove and also delete the files from the internal/external hard drives, SD cards, USB flash drives, etc.
Method 3- How to Remove Write Protection From Hard Drive Using Command Prompt
If the regedit option fails to fix write protection on a USB drive or SD card, you can try is to run the command attributes disk clear readonly. Here are the steps to do so:
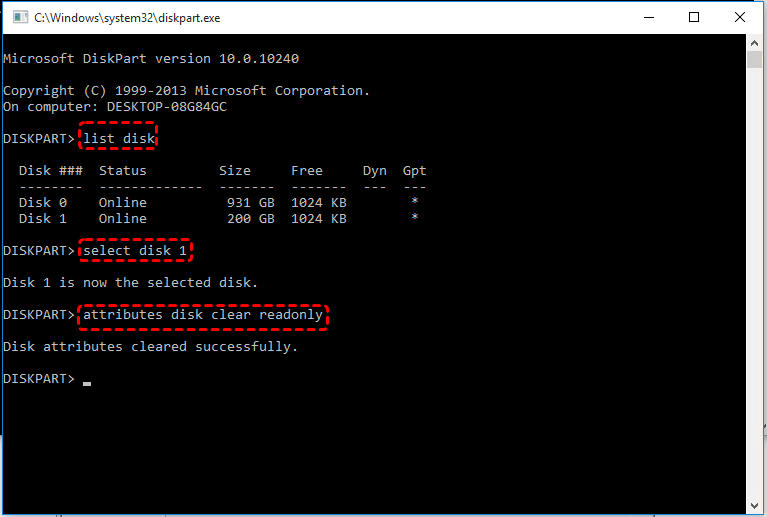
- First of all, you have to click the option “Start” and then enter the “diskpart” just to open the utility.

- Now you have to type “list disk” and then press “Enter” key.
- Next, type “select disk E” and then press the key “Enter”.
- Now, you have to type “attributes disk clear readonly” and then press Enter key.
- After this, just enter “exit” and then press Enter key to end the process.
After performing these steps, you will be easily able to remove write protection from SD card and will be soon able to transfer the files or format the SD card with ease.
Method 4- Turn off BitLocker partition in Windows
Generally, when you enable BitLocker on the external or internal hard drive partition then it will protect the files with its encryption feature. And in that case, you will not be able to do changes to the BitLocker partition unless the removal of write protection is operated.
So, to do that action, you have to follow the below steps:
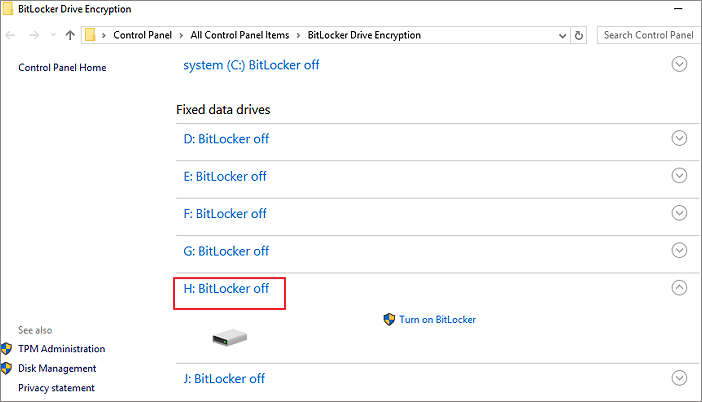
- First of all, you need to open “This PC” and then right-click on the BitLocker partition or storage devices and then you have to select “Manage BitLocker”.
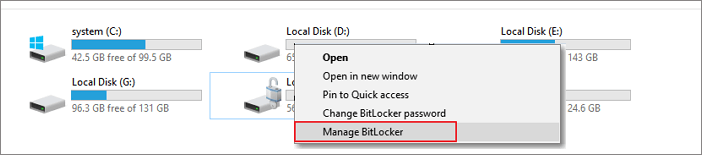
- Now you have to select the correct partition which is write-protected by BitLocker and there you have to click the option “Turn off BitLocker”.

- Now you have to wait and the BitLocker will automatically decrypt on its own.

- After this, you will be able to see the partition or external hard drive that shows BitLocker off. You can then manage the data on the partition without BitLocker write protection and then you have to save the new files to it again.
Method 5- Check & Fix the Write-Protected Hard Disk Using Error Checking
Another yet option that you can try to solve write protection on an external hard drive is to run Error Checking to figure out the issue in the affected drive and fix it.
Here are the easy steps to run this command:
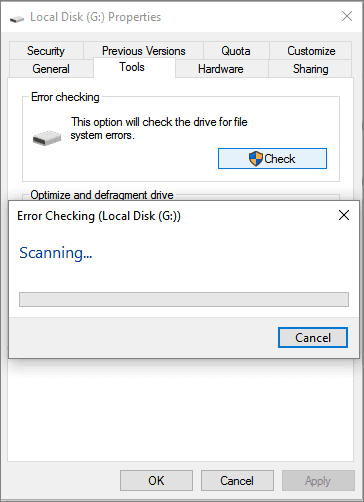
- Open the File Explorer >> find the write-protected disk >> right-click on it.
- Choose ‘Properties’ option & click on ‘Tools’ tab.
- Now, in the ‘Error Checking’, you have to click on ‘Check’ button.

- After this, a popup will appear, click on ‘Scan’.
- Once the scanning process gets over, the issue will be figured out and fixed it successfully.
Method 6- How Do You Format A USB That Is Write Protected
SD card write protection is the most irritating issue if it is in use. After write protection, you are not allowed to delete or modify files on the SD card. However, on the other hand, it is used to protect the original file and then prevents maloperation.
But, it is quite hectic to solve how to remove write protection from Pen drive. However, you can format the write protected SD card or hard disk so that you can fix the write-protected volume issue soon.
To do so, you have to follow these tips:
- First of all, you have to insert a USB flash drive into a PC and then open a Command Prompt window as an administrator.
- You can then type diskpart in the new command line window and then press Enter
- Next, you have to type there list disk and then simply hit Enter Here, the list disk command will display the disks present on the PC.
- Now, you have to type select disk X. Here, X is the drive number of the USB flash drive and then press Enter
- Next, type clean and then simply press Enter key, this command will delete all the data present on the USB flash drive.
- Now, type there create partition primary and then hit Enter This will create a new primary partition on the USB drive.
- Next, simply type there format fs=ntfs quick and then hit Enter.
Doing so will format the USB flash drive with the NTFS file system. However, if you want to use FAT32 file system instead of NTFS then kindly use Format fs=FAT32 Quick command.
Lastly, type there active and then press Enter key.

What Happens If You Lose Data From It After Removing Write Protection Error?
Well, in this case, if you lose all your content; say, images or videos from your respected storage device then you can use the External Storage Data Recovery Tool. This will definitely help you restore lost data from internal and external storage devices.
You can easily perform external storage data recovery using some manual ways or with the help of this tool. This tool is very easy to use and is available for Windows and Mac individually.


* Free version of the program only scans and previews recoverable objects.
Steps To Recover Lost Data From Storage Devices
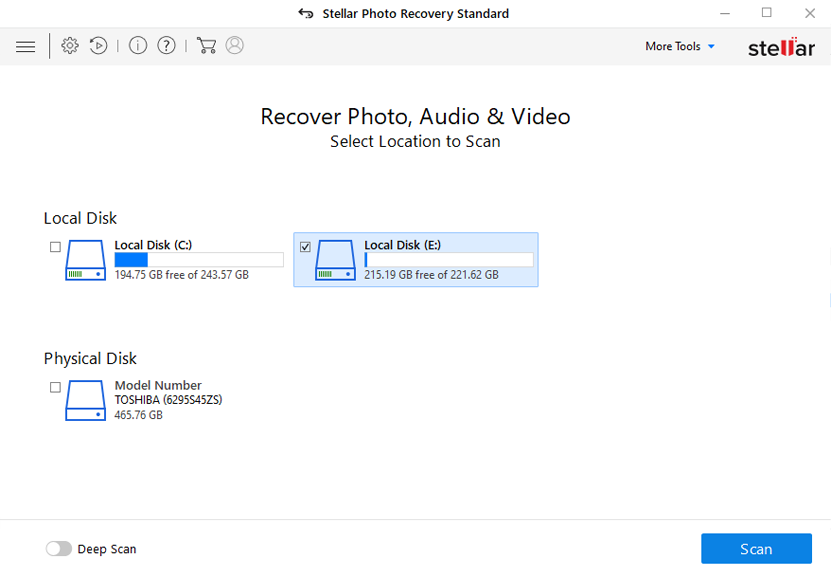
Step 1: Select Desired Location
Firstly, select the drive, external media or volume from which you want to recover deleted media files. After selecting, click on 'Scan'.
Step 2: Preview Recovered Media Files
Next, you can preview the recoverable media files after the scanning process is completed.
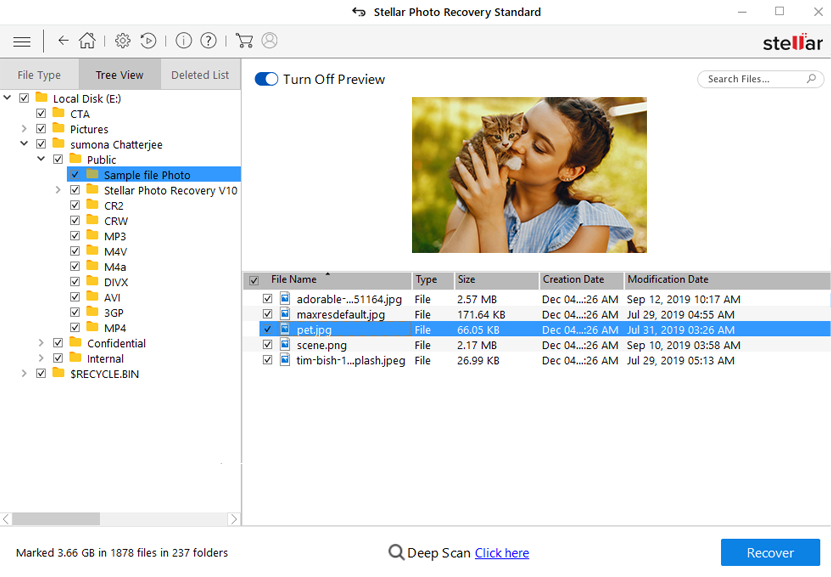
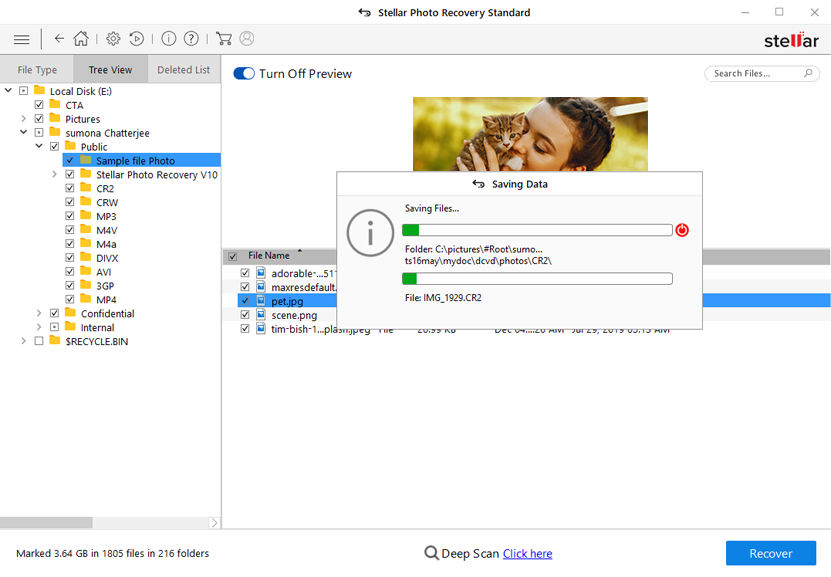
Step 3: Recover Media Files
Lastly, you can select the images, audio, video files you want to restore and click on 'Recover' option to save them at the location you want.
Related FAQs:
Yes, of course, it is possible to disable/remove write protection from the hard disk.
You can type in the command ‘attributes disk clear readonly’ & hit the Enter key to remove the write protection from the internal or external hard disk.
You can turn OFF write protection on your internal hard drive by trying the below tricks:
You can easily format the write-protected hard drive using Diskpart command or Disk Management. Using both the powerful options, you can format 2TB hard drive to FAT32, format RAW or corrupted hard drive easily. Is It Possible to Remove Write Protection?
What Command Removes Write Protection?
How Do I Turn Off Write Protection on My Internal Hard Drive?
How Do I Format a Write Protected Hard Drive?
Final Words
Using external storage devices for different digital media devices is so common but handling them with care is very important. But, some people make mistakes while using storage devices like external/internal hard drives/USB flash drives/Pen drives/SD cards, and more.
Sometimes, you get some errors or issues related to these storage devices. One such issue is- the write protected drive and it becomes quite important to solve how to remove write protection from hard drive Windows 11/10.
Also, if you ever notice that the data saved in the external hard drive is lost then you can try External Storage Data Recovery Tool. This is the easiest and the best solution you can try to recover deleted data from external storage devices in no time.
So, all the very best to you guys…..

Taposhi is an expert technical writer with 5+ years of experience. Her in-depth knowledge about data recovery and fascination to explore new DIY tools & technologies have helped many. She has a great interest in photography and loves to share photography tips and tricks with others.