When using a Mac OS, encountering issues with external drives is not uncommon. One such problem is the FAT32 greyed out on Mac disk utility, preventing formatting or drive repair. Thus, if you’re the one who also facing the same issue & want to know how to deal with FAT32 greyed out Mac issue, then don’t panic. You have come to the correct place.
This article comprises complete information regarding how to solve this problem in a hassle-free manner.
emid emid
emid
* Free version of the program only scans and previews recoverable items.
Why Can’t I Format My USB to FAT32 On My Mac?
It might be possible that the preference isn’t available in the USB drive you’re trying to format. For example, Mac doesn’t allow you to format 32 GB & smaller storage as FAT32. Another possible reason is running outdated basic drivers & extensions.
How Do I Change My Mac from FAT32 to exFAT?
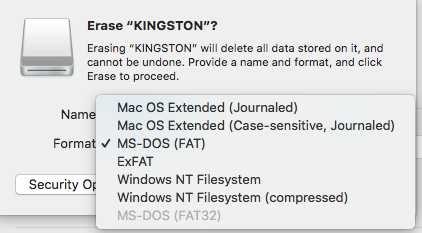
If the FAT32 file system remains unavailable, then exFAT is a brilliant alternative that works well across macOS & Windows platforms. But here, I will show you how to change Mac FAT32 to the exFAT file system.
Steps to be followed to do so:
- Insert your USB flash drive into your PC’s USB port.
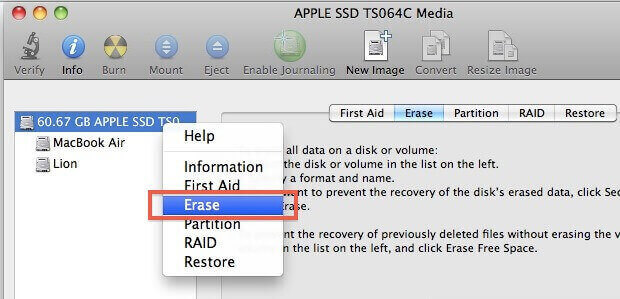
- Open Finder >> click Applications and Utilities >> Disk Utility.
- Now, select your external drive.
- Then, click on the Erase button which you can see on the top right of the screen.
- After that, name your flash drive and choose exFAT under Format.
How to Fix USB Flash Or External Hard Drives Greyed Out In Disk Utility?
Fix #1: Mount A Hard Drive
Sometimes, your FAT32 can be greyed out in Mac Disk Utility because it isn’t mounted. Therefore, you can try to mount your hard drive in a Disk Utility. In order to do so, first, choose your external hard drive >> make a tap on the “Mount” option which you can see at the upper menu bar.
However, if your external drive won’t mount in the Disk Utility, simply restart your Mac system & try again.
Fix #2: Update Disk Driver & Extension
Another option that you can try to fix FAT32 greyed out on Mac Disk Utility is to update the basic drivers & extensions. In order to update the outdated disk driver, simply open the App Store and select the update if there you can see the update option available.
Or if you get some error messages like “System Extension Blocked“, it simply means that a disk driver on your Mac OS isn’t working due to the lack of an extension, and you can easily enable this extension to be loaded in “Security and Privacy”. After updating a disk driver/extension, you need to reboot your Mac, re-connect an external hard drive to your Mac, and then remount this drive.
Also Read: Fix Mac Flashing Question Mark Folder Issue
How to Format External Hard Drive FAT32 In Mac Disk Utility?
In order to format the volume greyed out issue, you can use the CMD option. To do so, follow the below simple steps:
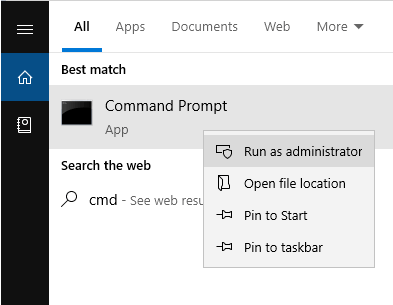
Step 1: At first, type the cmd in a search box.
Step 2: Make right-click on the Command Prompt >> select the “Run as administrator” option.
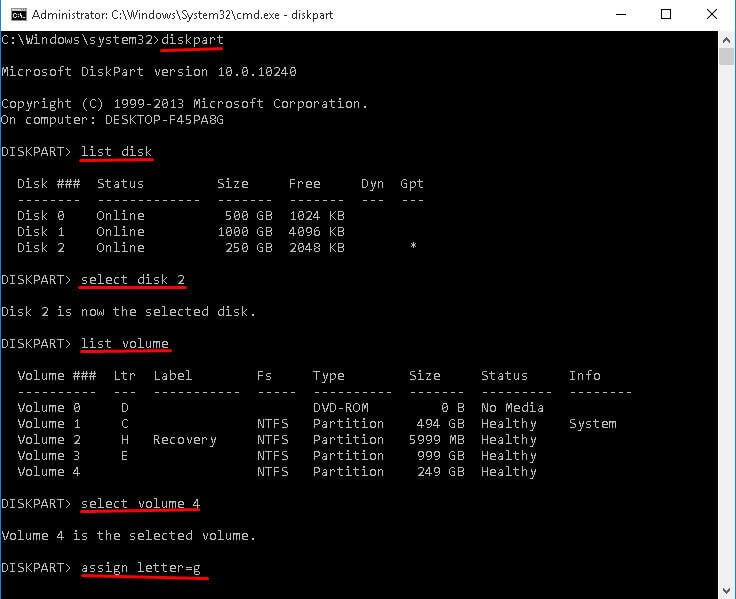
Step 3: Under The command prompt Window, you need to type the diskpart >> hit the “Enter“. Now, type the below command lines in the given order:
list disk
select disk X
clean
create partition primary
format fs=ntfs
assign
Step 4: Next, type list disk & press “Enter“. After doing so, all disk drives will be listed there, including your external hard drives.
Step 5: Then, type the select disk+disk number, e.g.- select disk 2 >> press “Enter“.
Step 6: At this time, type clean. This will clean up all your files & folders on a selected disk.
Step 7: Now, type creates partition primary & hit the “Enter“.
Step 8: In this step, you have to Type format fs=FAT32) >> press “Enter“.
Step 9: Inputting the assign to assign the drive letter to the recently created partition.
Try External Hard Drive Recovery Tool To Recover Lost Data After Fixing FAT32 Greyed Out Mac Error
It is possible that after trying the above fixes to troubleshoot FAT32 greyed out Mac issue, you can lose all your important stuff from the external hard drive. So, in such a situation, you can go with External Hard Drive Recovery for Mac. It is one of the best and most reliable programs which scans the entire storage system and recovers lost data (photos, audio, and videos) from Mac as well as Windows OS with ease.
emid emid
* Free version of the program only scans and previews recoverable items.
This data recovery software is 100% safe and performs the best recovery than any other software. Follow the below given simple steps without any technical support and recover data from the external hard drive in an easy way.
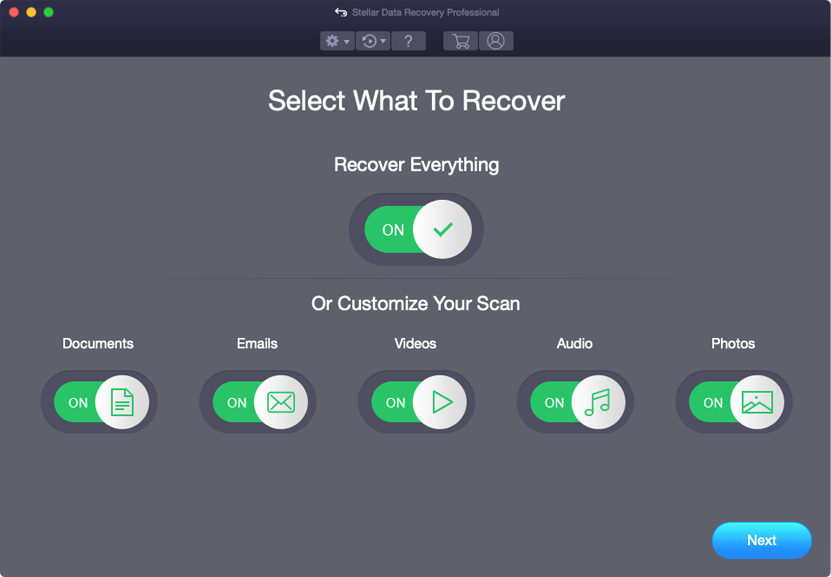
Step 1: Select Type of Data
First of all, you have to select the type of file you want to recover and then click on 'Next' option.
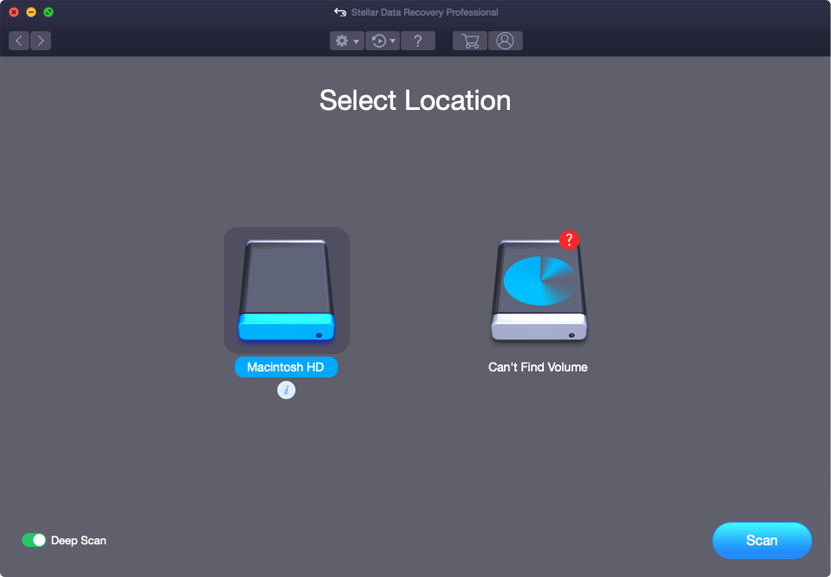
Step 2: Select Location
Next, you have to select the storage drive from where you have lost the data.
Step 3: Scan & Recover
After selecting the storage drive, you have to Scan, then Preview and after that Recover the files from Mac storage disk.

FAQ (Frequently Asked Questions)
Does Mac support FAT32?
Of course, the answer is YES. The format FAT32 is fully compatible with the Mac operating system.
Why Removable Drives USB Flash Drives Still Use FAT32 Instead Of NTFS?
The compatibility is perhaps the foremost reason why removable drives still use the FAT32 instead of NTFS. FAT32 has much better compatibility compared with NTFS, but it only supports the individual files up to 4GB in size and partitions up to 2TB
How Do I Format A USB To FAT32 On A Mac?
In order to format a USB, you need to plug in your USB drive in Mac. Next, choose the Applications >> Utilities and launch the Disk Utility From a disk utility sidebar. Then, choose the USB flash drive. From the disk utility toolbar, select the Erase. Give the formatted hard disk a name & choose either ExFATt or MS-DOS (FAT32) from a format menu.
Time To Conclude
After reading this article, it is clear that how to fix FAT32 greyed out Mac Disk Utility. So, there is no need to worry if it happens. As I’ve provided the easy ways that will surely help you out to fix the FAT32 greyed out Mac problem in a few easy steps.
That’s all…

Taposhi is an expert technical writer with 5+ years of experience. Her in-depth knowledge about data recovery and fascination to explore new DIY tools & technologies have helped many. She has a great interest in photography and loves to share photography tips and tricks with others.