The XVID video codec has become one of the go-to choice for users because of its efficient compression and high-quality playback. However, users may encounter errors while attempting to play the XVID-encoded videos using XVID codec. It may happen due to corrupt Xvid videos, outdated codec packs or compatibility issues. Today in this guide, we’ll delve into the common XVID video codec errors, their potential causes, and practical solutions to fix this issue effectively.
To Fix XVID codec error, we recommend this tool:
This software will repair flickery, stuttery, jerky, unplayable videos and supports all popular video formats. Now repair your corrupt and broken videos in 3 easy steps:
- Try this Video Repair Tool rated Great on Pcmag.com.
- Click Add File to add the video you want to repair.
- Select Repair to start the repair process and save the repaired video on the desired location after the repair is done.
So, without any further delay, let’s get started….!
Common Causes of XVID Video Codec Error
If you are wondering about what causes XVID codec errors on your system then do not worry. Below, you can find some of the most common causes of this error:
- Xvid codec is not installed properly or becomes corrupted.
- Incompatibility issues between the XVID codec and media player.
- Incomplete downloading of files might corrupt the XviD encoded videos.
- Using an outdated version of the XVID codec.
- Virus or malware might corrupt the XVID codec files.
- Outdated or faulty graphics drivers can cause codec errors.
- Conflicts between multiple codecs installed on your system.
How To Fix XVID Codec Errors?
Here, you’ll find the list of some of the Xvid video codec error, their causes and fixes. So, let’s check them out one by one:
Error 1: Xvid Codec Installation Problem
Causes
- Xvid file gets corrupted during installation.
- Installing the Xvid video from any unreliable source
- Incomplete downloading of videos
- Anti-virus software or conflicting codecs might interfere during Xvid codec installation.
Fixes
In order to fix this issue, you’ll need to re-download the installation file from any reputed website, uninstall the conflicting codecs etc.
In case, you have installed a K-Lite codec on your system that might conflicting with the existing codes, you can uninstall it by following these easy steps:
- Open Windows search box & type Control Panel.
- Then, choose Programs and Features & look for the required codec that you need to uninstall.
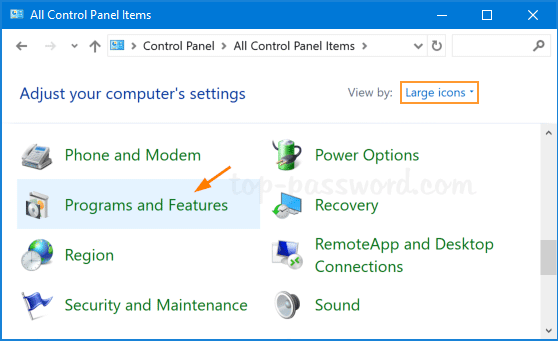
- Now, find the codec then right click on it & select the Uninstall
Besides that, the presence of viruses/malware on the system can also corrupt the Xvid encoded videos during file installation which might causing the issue. Therefore, to fix XVID codec virus issue, you can try disabling the anti-virus program.
How to disable an antivirus program on Windows:
- Open Windows settings by pressing Windows + I
- Then click on Update & Security > Windows Security > Virus & threat protection.
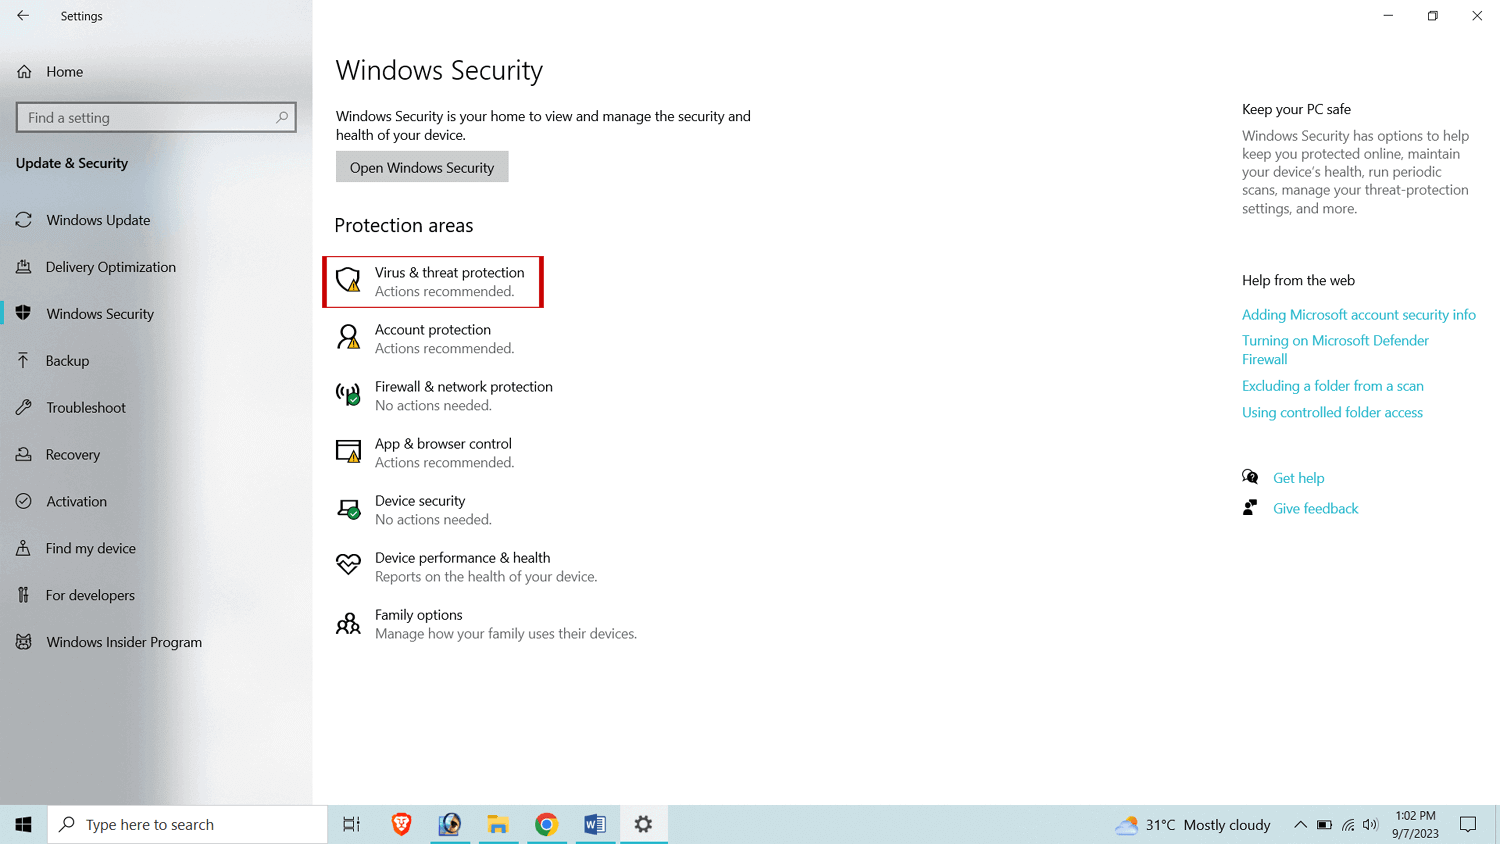
- Locate the “Virus & threat protection settings” then click on Manage settings.
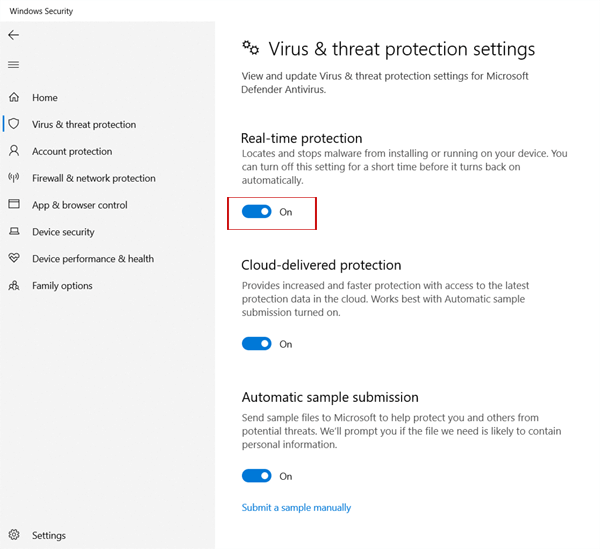
- Here, you need to turn off the “Real-time protection to disable the anti-virus programs temporarily.
Error 2: Video Is Distorted/Corrupted When Playing Xvid Movies
Causes
- Due to the corrupted, damaged or broken video files.
- Playing XviD video on updated media player with outdated Xvid codec
Fixes
To overcome this situation, make sure to install the latest version of video codec and use the updated media player to play the Xvid video.
Install the latest version of Xvid codecs:
- Firstly, you need to download the XviD codec for Windows
- After that, double-click on your downloaded file to begin the installation
- Now, simply follow the onscreen instructions to download & install the newer version of Xvid codec.
You may also, try updating the graphic card drivers to avoid such problems.
Follow these steps to update the graphics drivers:
- Right-click on the Start menu and choose Device Manager.
- Once the device manager window opens, double-click on the Display adaptors.

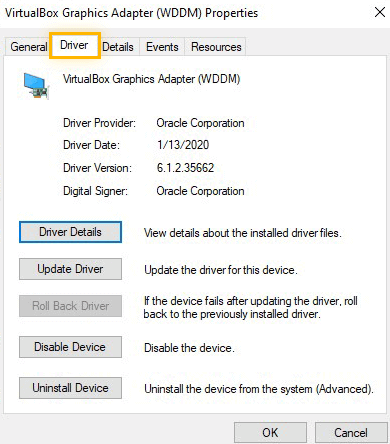
- Next, right-click on your GPU (graphics card), & select Properties.
- Go to the Driver tab and click on the Update Driver
Error 3: Xvid Movies Won’t Play
Causes
- Due to outdated or incompatible video codec
- Playing a Xvid video in outdated media player
- Because of the corrupted XviD video files
Fixes
To deal with this issue, make sure to install the latest & supported version of XVID video codec required to play media or Xvid encoded video.
Many times, updating the media player, converting the video file format can also help to fix this issue. Alternatively, you can use different media player to play your Xvid video files.
Steps to convert the video file format using VLC:
- Launch VLC media player then open your Xvid file in it.
- Navigate to the “Media” option then click on Convert/Save.

- Now, simply add the input files that needs to be transcoded.

- Again, make a click on Convert/Save
- Under the convert window, click on Convert
- Next, click “Edit the Selected Profile” & confirm all the changes made.
- At last, choose to add a new profile or delete the current profile & click on
To deal with video file corruption issue, you can use an advanced Video Repair Tool to fix the corrupted video file.
Also Read – Videos Playing In Slow Motion – 9 Ways To Fix
Error 4: No Sound When Playing Xvid-Encoded Videos
Causes
- Missing or incompatible audio codecs
- Due to the outdated audio drivers
Fixes
To fix this issue, check the sound of the media player and system, if they have been muted. Also, make sure to install the latest version of XviD codec on your system.
Additionally, look for the missing Xvid codec, & just install them on your computer to resolve the “No audio” issue.
Error 5: Out-of-Sync XviD Encoded Video
Causes
- Incomplete downloading of videos
- Using an outdated drivers or media player
Fixes
To solve this issue, make sure to download the XviD videos successfully or restart the media player. Also, ensure to use the updated drivers and latest version of media player.
How To Repair Corrupt Video Encoded with XVID Codec?
If you can’t play your XVID encoded video even after trying the above fixes then there is a chance of video file corruption. In such a situation, you can use the most reliable Video Repair Tool to fix the video corruption issue.
This software will not only help you repair the corrupted video files but also fixes the freezing, out of sync, no sound, inaccessible or unplayable videos effectively. Besides that, it supports all the video file formats such as – repair corrupt MP4, MOV, F4V, M4V, AVI, MKV & other video files formats.


* Free version of this program only previews repaired videos.
So, just quickly download & install this software on your PC and repair Xvid video files in no time.
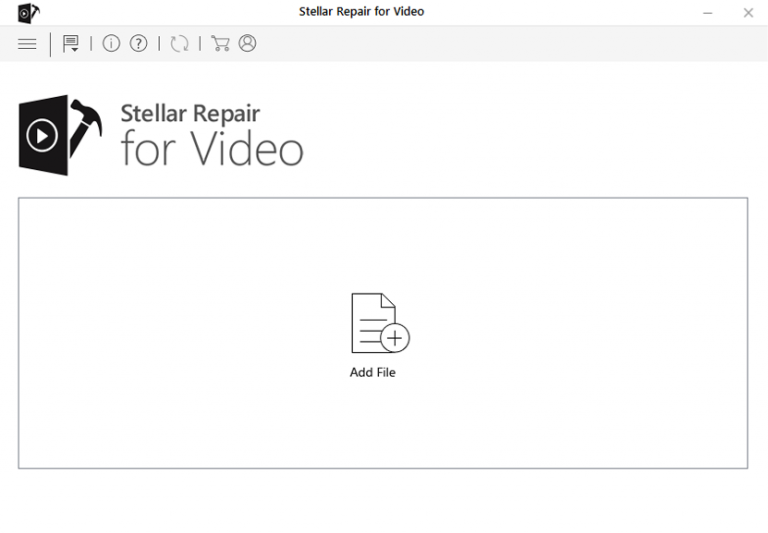
Step 1: Download, install and launch Video Repair software on your system. Click on 'Add Files' to add corrupted video files.
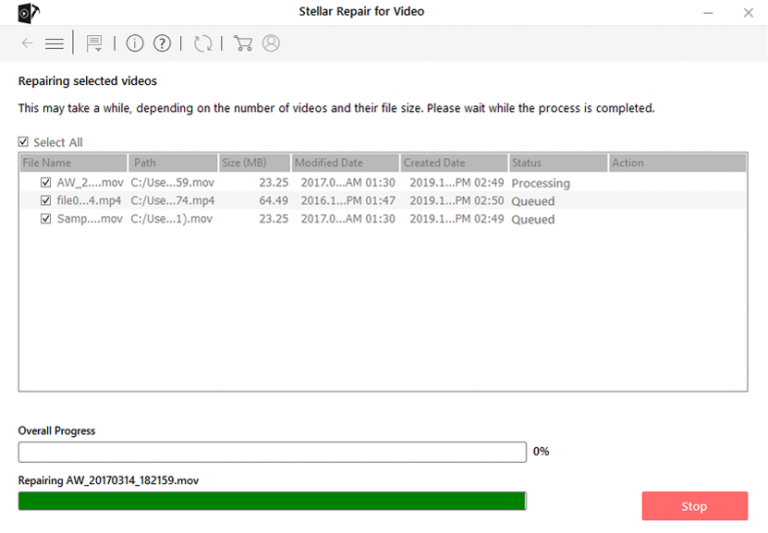
Step 2: Click on 'Repair' button to begin the repairing process. This start repairing your added video files one by one.
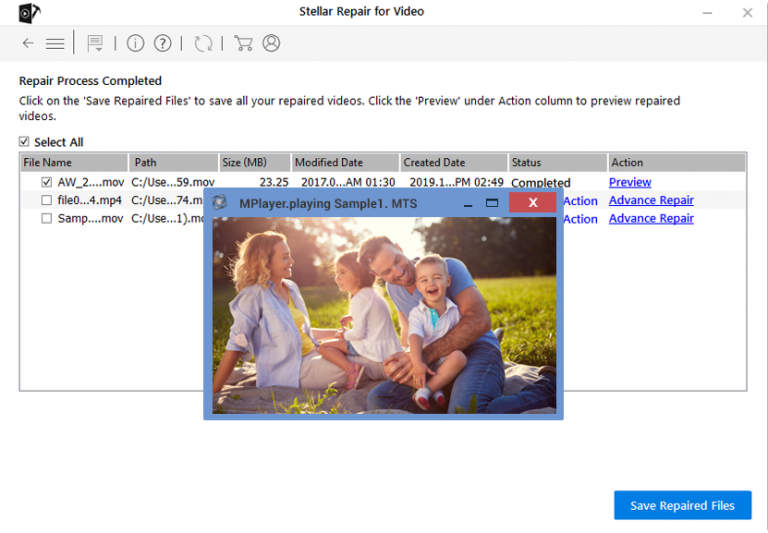
Step 3: You can click on 'Preview', in order to preview the repaired video file within the software and click on 'Save Repaired Files' button to save the repaired videos at desired location.
FAQs [Frequently Asked Questions]
Is XVID A Good Video Codec?
In most of the cases, it is seen that the quality of the Xvid is better than DivX. It is an open source video codec that is freely available to the people. Also, it have a good quality videos at low compression. Thus, you can say, Xvid is a good video codec.
What Is The Best Xvid Codec Player?
VLC is known as the best Xvid codec player as it supports a wide range of video and audio formats. Besides, it is a super lightweight as well as stable Xvid video codec player that allows you to enjoy the Xvid codec videos.
What Format Is Xvid Video?
Xvid is a popular video codec that is highly used to compress the video files using MPEG-4 Part 2 ASP format.
Why Is VLC Not Playing Xvid?
Generally, Xvid files can be easily played in the VLC Media Player. However, at times VLC fails to play the Xvid video due to some possible reasons. Some of the common reasons are - improper installation of Xvid codec, using outdated versions of VLC etc.
How Can I Play Xvid Codec On Android?
Here are the list of the best video player that can be used to play the Xvid Codec on Android:
- VLC Media Player.
- MXPlayer
- KMPlayer
- PLAYit
- Mobo Player
- ACG Player
Conclusion
Xvid video codec error can occur due to several reasons like – codec installation problem, outdated or incompatible codec, corrupted video file etc. After reading this post you’ll surely able to deal with Xvid codec issues.
Here, in this post I have discussed the 5 common Xvid codec error along with its possible causes and fixes. So, if you ever come across through any of these errors, you must apply the aforementioned fixes to solve Xvid codec error.
Besides, you can choose our recommended Video Repair Software to fix your corrupted or damaged Xvid videos.
If you found this post helpful, don’t forget to share it!


Taposhi is an expert technical writer with 5+ years of experience. Her in-depth knowledge about data recovery and fascination to explore new DIY tools & technologies have helped many. She has a great interest in photography and loves to share photography tips and tricks with others.