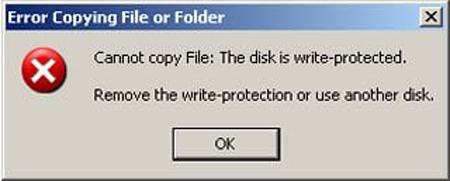
USB flash drives/Pen drives are the most convenient way to transfer data from one device to another. However, at times while trying to copy or transfer data from USB, you often receive an error saying that “the disk is write protected”. This error message usually prevents you from adding, deleting or even making any changes to your storage device.
So today in this guide, we are going to discuss about how to remove write protection from USB drive using 6 easy and effective ways. These methods will not only work for USB drive but also for SD cards, external hard drives etc.
Free USB Drive Data Recovery Tool.
Recover data from USB drives, Pen drives, SSDs, HDDs, and other devices on Windows. Try now!
Write protection is a feature that prevents your storage device from any unauthorized access, accidental deletion, malicious attack, etc. It is also known as the ‘Read Only‘ mode.
When the write protection feature is enabled in your drive, you won’t be able to add, delete or modify the data stored in your drive. However, they can only be viewed or copied.
Why Is My USB Drive Write Protected?
Your USB flash drive often gets write-protected due to the following reasons:
- The write protection switch is enabled
- Virus or malware attack
- BitLocker encryption is enabled
- The USB drive is full.
So, these are the most common reasons for getting this annoying error. Now, let’s move ahead to know how to remove write protection from USB using 7 workable methods.
How to Remove Write Protection from USB Drive or Other Devices?
Since you are unable to access your data stored in a write-protected USB, it’s very important to disable this feature from USB. Here are the simple but effective ways to fix “the disk is write protected” error.
#1: Check the Write Protection Switch
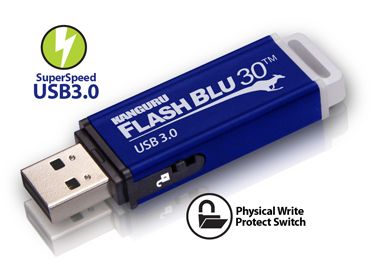
Some data storage devices (USB drives/SD cards) have a physical switch that is located at the side (left or right) of the drive. This switch allows the users to enable or disable the write protection feature.
If your USB drive has this physical switch then make sure it should be an unlocked position. However, if it’s not then simply slide up the switch to unlock your drive and remove the write protection from it.
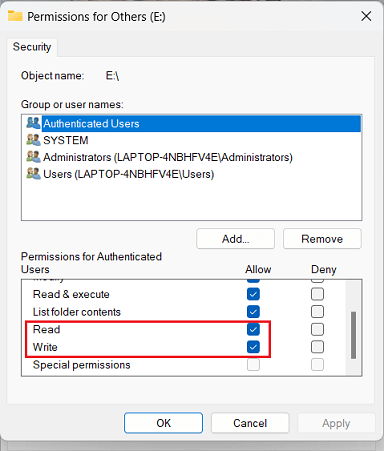
#2: Change Read-Write Properties of USB
In order to change Read-Write Properties of USB follow the below-mentioned steps –
- Open This PC/My Computer and look for USB drive under ‘Devices & drives‘.
- Right-Click on the USB drive and click on ‘Properties‘.
- Now under ‘Security‘ tab click on ‘Edit‘ button and allow the ‘Read‘ and ‘Write‘ permissions.
#3: Remove Write Protection from USB Using DiskPart Utility
DiskPart is Windows powerful command line utility that helps to remove attributes from the specific partitions or entire disk. So, you can use this method to disable write protection from USB.
Here’s what you need to do:
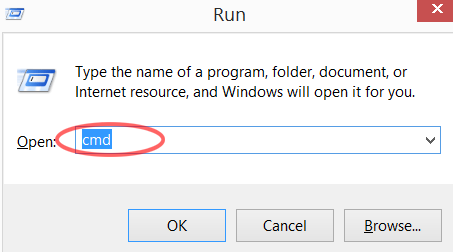
- Press Windows + R keys to launch a RUN dialog box.
- Then, type cmd and choose Command Prompt from the result.
- Now, a command prompt window will open where you need to type diskpart and press
- After that, type list disk & press Enter again to view your available disks.
- Next, type select disk 2 & click Enter. Here, you need to Replace 0 with a write-protected device number.
- At last, type attributes disk clear readonly then press Enter.
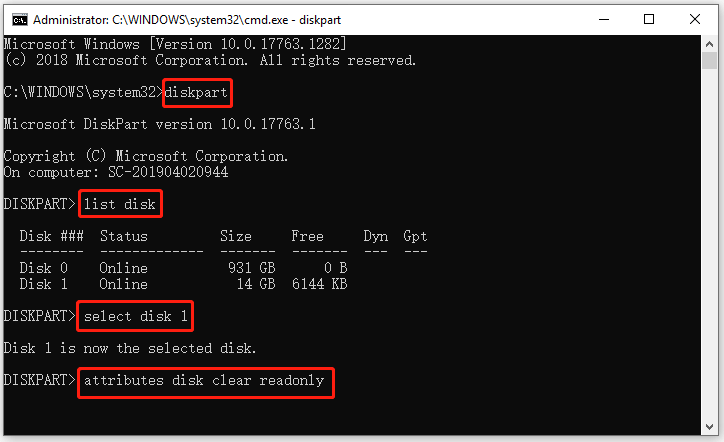
- Once the process is over, simply type exit and press Enter to quit from Diskpart.
Now, restart your computer and check whether you are able to add data or makes to your write protected USB or not.
You May Also Read – How to Remove Write Protection from Hard Drive Windows 11/10?
#4: Disable Write Protection From USB Using Windows Registry
You can also try to remove write protection from USB drive by modifying or editing the Registry editor. Windows registry allows its users to change the database values that has been stored in Windows.
Since the values of write protection are also stored in Registry, you can simply manipulate the values to disable the USB write protection.
Please Note – Before using this method, it’s recommended to save the backup of your Registry settings. If you have made any wrong changes in Registry editor, it can damage your OS itself.
So, you must try each & every steps very carefully:
- Open the RUN dialog box and type Regedit in it.
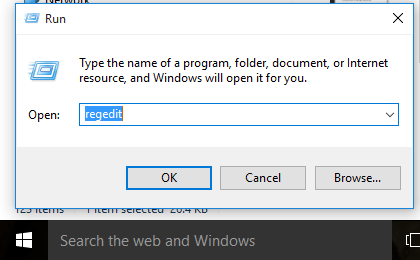
- After that, choose exe from the result to open the Registry editor.
- Now, simply navigate to the following path:
Computer\HKEY_LOCAL_MACHINE\SYSTEM\CurrentControlSet\Control\StorageDevicePolicies
- Now, look for a key named WriteProtect.
If it exists, double-click it. This will open the Edit DWORD (32-bit) Value box. You can now set one of two values: 0 or 1.
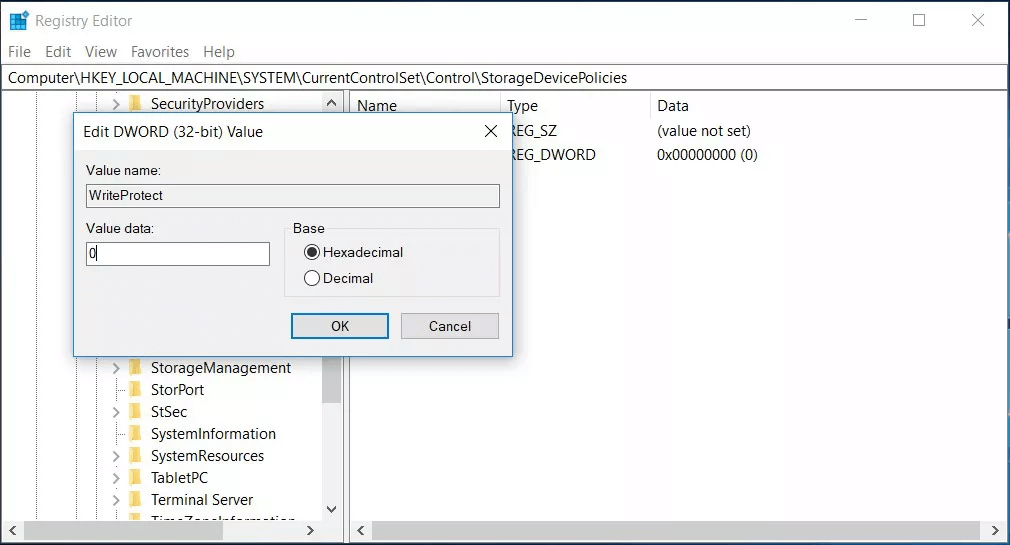
- 1 means “Yes, write protect my USB storage devices.”
- 0 means “No, don’t write protect my USB storage devices.”
But here you have to remove the write-protection from the USB drive. So you should set the value to 0 and press OK.
That’s it, you can now format the drive normally by right-clicking on it in My Computer and choosing Format as mentioned in above solution no 6.
After this, I am sure “The disk is write-protected. Remove the write-protection or use another disk.” error message will no longer pop up.
#5: Turn Off the BitLocker Protection
If the BitLocker encryption is enabled on your USB drive then it can add write protection to your device.
So here, you need to determine that, the BitLocker partition should be disabled. You can simply turn off the BitLocker by following these steps:
- Open the File Explorer then make a right-click on the BitLocker partition/USB drive and choose Manage BitLocker.
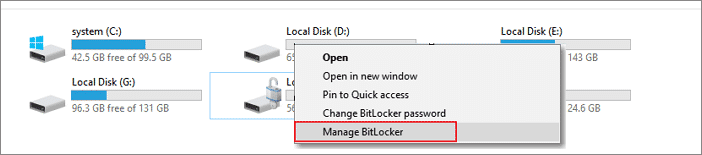
- This time, you need to select your locked drive & click on Turn off BitLocker to disable it.
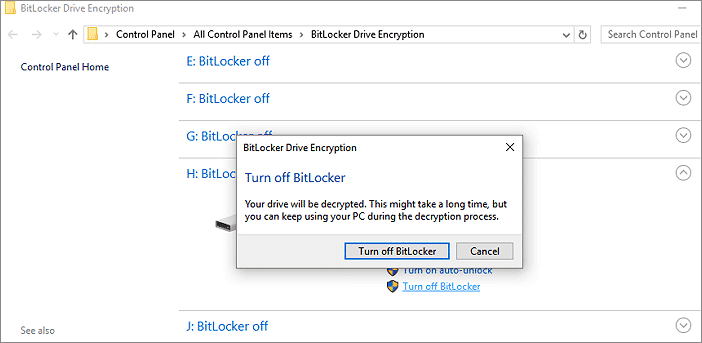
- Now, wait for the BitLocker protection to decrypt.

- As you have turned off the BitLocker, now you can simply manage your USB drive data.
#6: Format the USB Drive to Remove Write Protection From USB
Even after trying the above fixes, if you are unable to remove write protection from SD card/USB drive then one and last option left for you, that is formatting the write protected USB.
Important Note: Before using this method, make sure to save the backup of all your USB drive data to your PC or any other removable disk. Because formatting the USB will erase the entire data stored in your drive. However, you can simply recover them by using the USB Drive Data Recovery Tool.
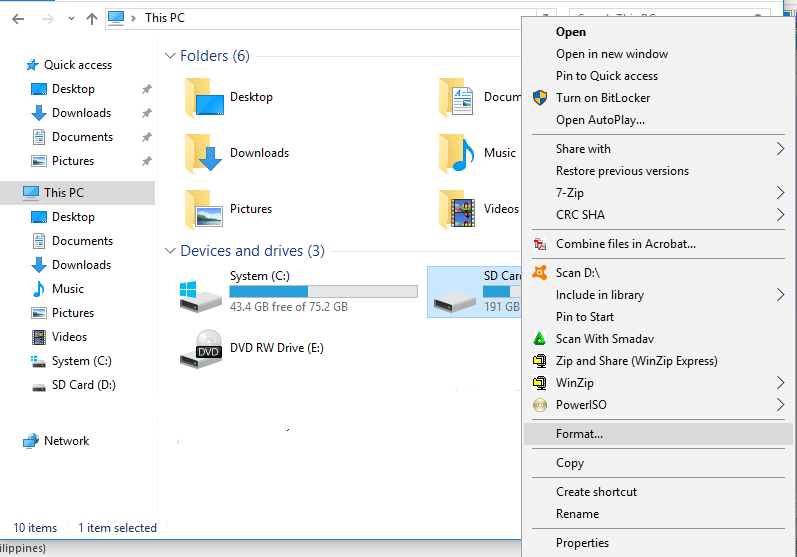
- Go to My Computer/This PC.
- Right-click on your USB drive and select Properties.
- Then, locate your write protected disk then right-click on it & select Format.
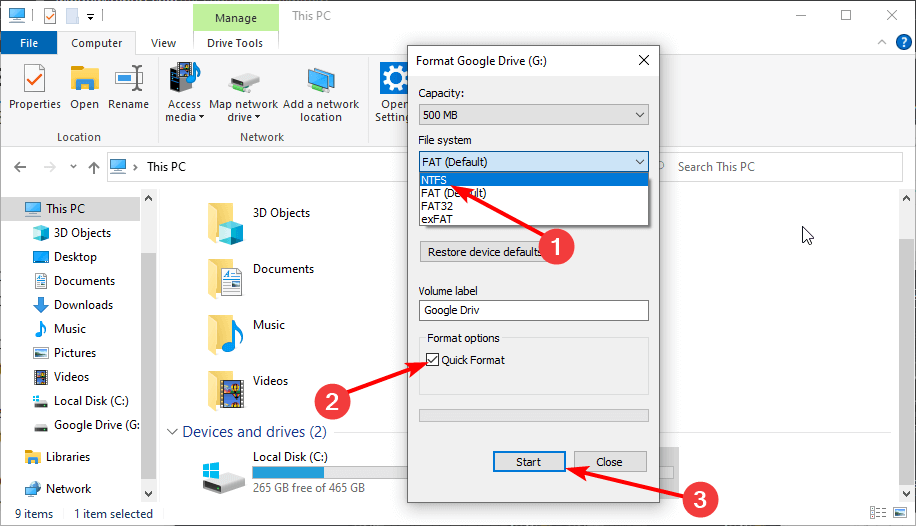
- Here, you need to choose the file system by clicking in the dropdown menu. (make sure to select the Quick Format option checkbox)
- Finally, click on the Start button to begin the formatting process.
Depending on the size and capacity of the drive, the formatting will take some time. The larger the drive, the longer you have to wait.
If there is no physical problem with USB then your USB drive will be formatted, cleaned and ready to use again.
Video: Remove Write Protection From USB Drive
You can watch this video as well to remove write protection from USB drive. It explains the best solutions that will help you to remove write protection from storage drive like external/internal hard drives/SD cards/USB drives. Just watch it…
How To Recover Data From A Write Protected USB Drive?
While attempting to remove write protection from USB, if you find any of your data have been lost from your drive, then simply use USB Drive Data Recovery Tool to get your data back.
It is one of the powerful data recovery tool that is specially designed to recover lost, deleted, missing, erased or inaccessible data. No matter, whether you have lost your data on USB/Pen drive, SD card, or any other data storage devices. You can simply recover your missing data by using this tool.
This software will not only help you to recover data from write protected USB but it can also recover data from locked, virus infected, corrupted or even formatted device.
So, what are you waiting for? Just download and install this software on your PC and perform Pen Drive Data Recovery with ease.


* Free version of the program only scans and previews recoverable objects.
Follow the step-by-step guide to know how to use this software:
FAQ [Frequently Asked Questions]
Can You Recover Data From A Write-Protected USB Drive?
Yes, the data can be recovered from a write-protected USB drive using the above recommended USB Data Recovery software. This tool can not only recover files from USB but also retrieve files from various data storage devices.
How Do I Turn Off USB Write Permissions In Windows 10?
You can turn off the USB write permissions in Windows 10 using the Group Policy Editor.
- Open the Run dialog box by pressing Win + R keys.
- Then, type gpedit.msc & press Enter to open the Group Policy Editor.
- Navigate to Computer Configuration -> Administrative Templates -> System -> Removable Storage Access.
- Double-click on 'All Removable Storage classes: Deny all access' then select 'Enabled' then click 'OK.'
That’s it! Now, this will restrict the USB devices' write permissions on Windows 10.
How Do I Force Delete A Write-Protected USB?
To force delete a write-protected USB, you can follow these steps:
- Open Command Prompt as an administrator.
- Then, type diskpart and press Enter.
- Again, type list disk & press Enter to show all the connected disks.
- Type select disk X (replace X with a drive number).
- At last, type attributes disk clear readonly and press Enter.
How Do I Change My Pendrive From Read-Only To Writable?
You can try the below methods to remove write protection from a read-only to writable:
How Do I Know If My USB Drive Is Write-Protected?
When you attempt to save, delete, or modify files on the USB drive, you’ll probably receive an error 'the disk is write-protected', it simply indicates that the write protection feature is enabled.
Conclusion
When it comes to protect your data from any unauthorized access or data loss, the write protection feature comes handy. However, at times this feature restricts you from accessing your important data.
Here in this post, we have provided the 6 workable solutions on how to remove write protection from USB drive. So, if you are not able to access your data stores in a write-protected USB, then try out the given fixes one by one.
Hope you’ll able to remove write protection from USB successfully.
I hope you liked this post…..
References – https://answers.microsoft.com/en-us/windows/forum/all/usb-write-protected-error/bcc27819-7289-4673-a764-991ba4965f0a

Taposhi is an expert technical writer with 5+ years of experience. Her in-depth knowledge about data recovery and fascination to explore new DIY tools & technologies have helped many. She has a great interest in photography and loves to share photography tips and tricks with others.