Watching videos without any interruption feels so relaxing than watching a dull, blurry, pixelated or choppy videos. When you render the video or play it using editing tool, it looks amazing. However, at the time of exporting or sharing the video, it might loses its quality and becomes blurry, choppy, pixelated, noisy, etc. In this article, I am going to show you how to fix video quality loss after export issue using 10 best ways.
To fix loss of video quality after export, we recommend this tool:
This software will repair flickery, stuttery, jerky, unplayable videos and supports all popular video formats. Now repair your corrupt and broken videos in 3 easy steps:
- Try this Video Repair Tool rated Great on Pcmag.com.
- Click Add File to add the video you want to repair.
- Select Repair to start the repair process and save the repaired video on the desired location after the repair is done.
So, without skipping a single line keep reading this post till the end.
Why Video Loses Its Quality After Export?
Well, there can be several reasons due to which your video might loses its quality. These reasons ranges from outdated graphic drivers to incompatible video codes.
Apart from these, sometimes a wrong export settings combination or a certain special effect can also cause Premiere pro quality loss after export issue.
You can identify the possible reason of this issue and fix it using the below listed methods.
How To Fix Loss Of Video Quality After Export
Well, to know the ways to fix video quality loss after export, you can try the below-mentioned solutions. Most of the people tried all these solutions and able to fix loss of video quality after export. So, you can also try them once:
List Of Solutions:
- #1: Play Video In Another Media Player
- #2: Restart Your System And Export Video Again
- #3: Check Your System Specification
- #4: Remove Special Effect And Export
- #5: Convert Videos To A Compatible Format
- #6: Increase The Bit Rate Of Video
- #7: Customize The Export Setting
- #8: Update The Graphics Driver
- #9: Change The Codec
- #10: How To Fix Corrupt Video File Using Video Repair Tool
Method #1: Play Video In Another Media Player
It is quite possible that the media player you are using does not support the video file format or the codec that compresses the video file to export. Make sure that you try the video in another media player like Windows Media Player, VLC Media Player, PotPlayer, etc.
From these players, VLC Media Player is one of the most widely used players and videos that doesn’t play in any media player, plays in VLC Media Player. This is because it comes with its own internal codecs and plays any video file formats. One can use this media player in the platforms like Windows, Mac as well as Linux.
Method #2: Restart Your System And Export Video Again
It is possible that because of system conflicts or any issue, the video export could fail. In that case, you can try to export the video again after you restart the system. There is a possibility that your exported video might play very well without any loss of video quality issues after the system is restarted.
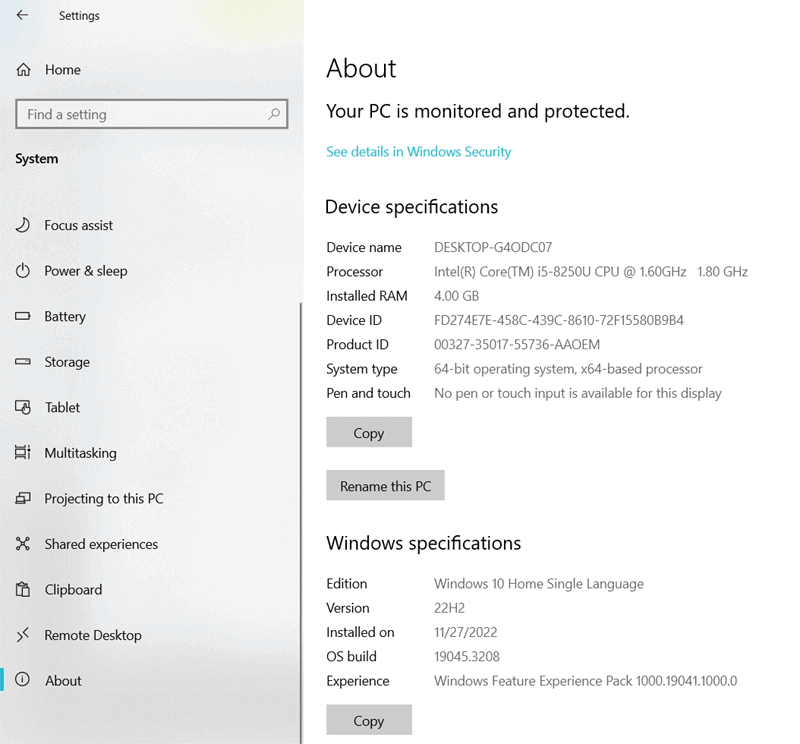
Method #3: Check Your System’s Specifications
Always make sure that there is sufficient memory space, GPU and CPU so that it can save large-sized movies or videos. Never forget that your system should be powerful enough to save the heavy rendered videos.
Here’s how to check the system’s specifications:
- Click on the Start menu & choose Settings (Gear icon)
- Select System then scroll down and click on About.
- In this screen, you will get specs for your Memory (RAM), processor & other system info, including the Windows version.
Method #4: Remove Special Effect & Export
It is possible that if you render the video via any third-party plugins then it can cause issues on export. Make sure that you export video without any special effects. To do so, you have to first select a video clip with effects and then make a copy of its timeline. Next, you have to remove all effects in the same timeline and then simply export the video.
Method #5: Convert Videos To A Compatible Format Like MP4
In order to fix loss of video quality after export, you can convert videos to MP4. It is one of the most compatible file formats for video to play in any media player. From iOS, macOS, Windows to Android, it seamlessly plays the videos while maintaining the quality with respect to the video size.
This is suitable for online video streaming that induces the less loss of quality with higher compression and it is compatible with almost all the popular media players as well as sound card drivers.
Also, you can convert the video file to other file formats using the VLC Media Player or any third-party converter tools. Those tools can also compress the videos as per requirements.
Also Read – How to Fix Bad Quality Videos? 8 Quick Fixes
Method #6: Increase The Bit Rate Of Video
Well, the quality of the video file is measured by bit rate. If the bit rate of the video is higher then it is obvious that the quality is also better. However, to fix loss of video quality after export, you can re-export the video with the higher bit rate settings.
Generally, the combination of acceptable setting is a compression format of H.264 and bit rate 3000 kbps, along with the dimension 1280×720.
Make sure that you keep the videos in the 3000 to 5000 kbps bit rate range. Video’s bit rate can be checked using any media player. However, if you check the video bit rate in VLC Media Player, then you have to first go to Tools and then select Media Information. And, in QuickTime, you have to press command and I key together to view the information related to the video’s bit rate.
Method #7: Customize The Export Settings
If you want to fix loss of quality after export then make sure that the export settings in the timeline are according to the source video clip format and the quality. It is quite vital to get good video quality after export.
Nowadays all video editing software has a provision of advanced and recommended settings. Make sure that you customize the settings and apply them as per the requirement. After then, re-export the video in the right size in order to prevent the shaky, blurred or choppy or jerky videos and also improve the video quality.
You have to select dimension, resolution, bit rate, aspect ratio, etc which would be based on the video’s frame rate, size and format. Make sure that you preview the video before you export it.
Sometimes, the settings of the video may also vary depending on the platform you want to upload, whether it is Instagram, Vimeo, YouTube or just use for archiving.
As for example, YouTube videos used to work at standard settings of 1920x1080p HD and 1280x720p HD in a 16:9 aspect ratio. However, if you set the aspect ratio to something very less than 16:9 then the vertical black bars on left and right sides of the video display will appear.
On the other hand, there is no limitation of 16:9 aspect ratio in Facebook but the size of the video must not exceed 4GB. The recommended format is H.264 and the resolution may vary with 720p or 1080p. However, for Instagram, the MP4 video is a preferred format with H.264 codec and 3500 kbps bitrate.
Method #8: Update The Graphics Driver
A fuzzy and poor video can be easily improved by simply updating the graphics driver of the system. The major role of Graphics driver is to enhance the media’s performance on PC. Graphic drivers can improve the brightness, color, sound, font and complete picture experience. You need to upgrade to the latest version of graphics drivers in order to improve the exported video’s quality.
Here’s how to do so:
- Right click on the Start menu & choose Device Manager.
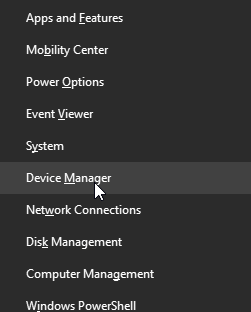
- Expand the Display adaptors option by double clicking on it.
- Right click on GPU (graphic card) then select Properties.
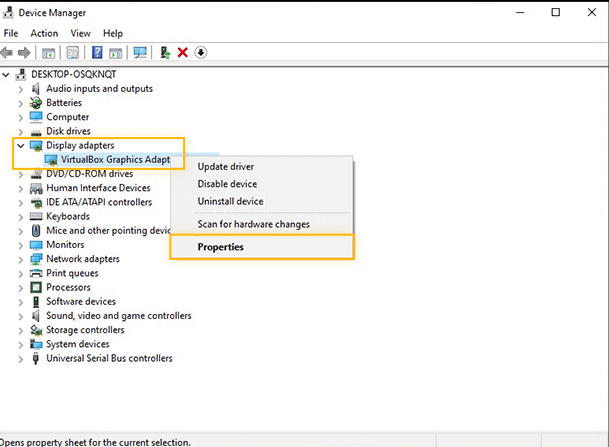
- Next, go to the Drivers tab and click on the Update driver option.
Method #9: Change The Codec
Last, but not the least, to know how to fix loss of video quality after export, try this solution which is to change the codec. The truncated or broken video might be because of the incompatible codec of the file format or the absence of the correct codec in the system. So, make sure that you try to export the video with a different codec.
However, the best way is to first repair the video codec issue with the use of VLC Media Player. Here’s how to do so:
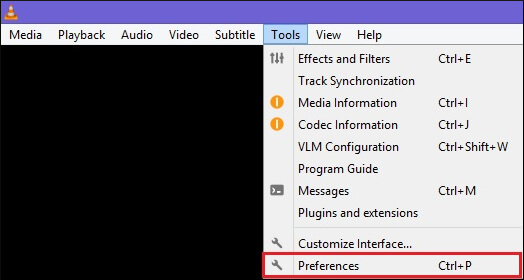
- Open VLC player then go to Tools & choose Preferences option.
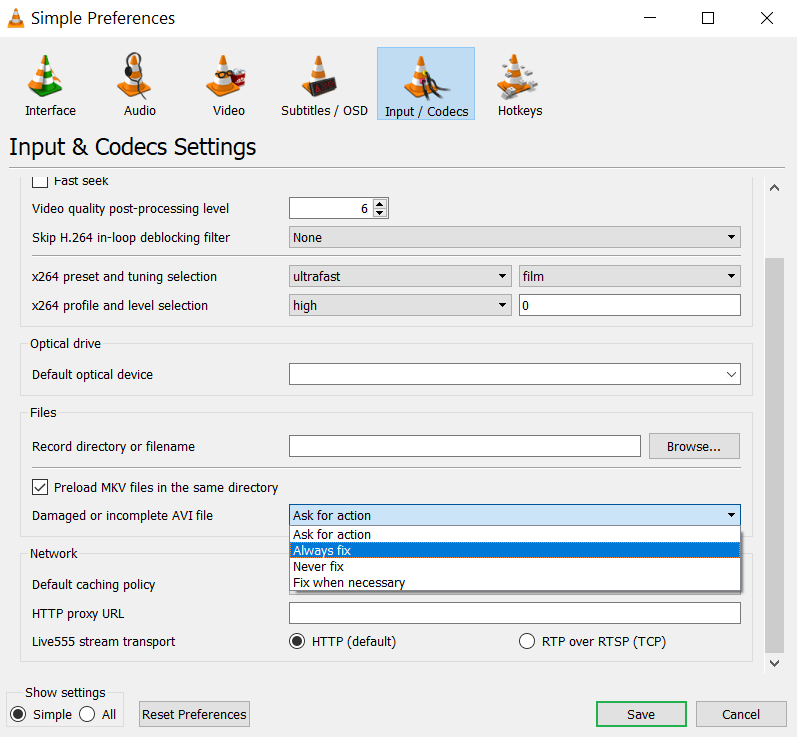
- In the simple preferences window, click on Input & Codecs then scroll down to the files section.
- Here, you need to select Always Fix option from a drop down menu & click the Save option.
Method #10: How To Fix Corrupt Video File Using Video Repair Tool?
Even after trying so many fixes, if you are still not able to fix video quality loss after export then there is a good chance that your video file get corrupted due to some reason. If this is the case, then I will suggest you to use the most powerful and reliable Video Repair Tool.
It is an advanced repair that has an ability to repair almost all sorts of video corruption issues such as choppy or jerky, grainy, broken, blurry, frozen, video flickering, and more. It is very easy to use and doesn’t require any technical skills.
And the best thing about this software is that, it is available for both Windows and Mac OS. So, quickly download and install this tool to repair corrupt video files. And this is how, the video quality loss after export issue is fixed.


* Free version of this program only previews repaired videos.
Follow the step-by-step guide to know how to use this software:
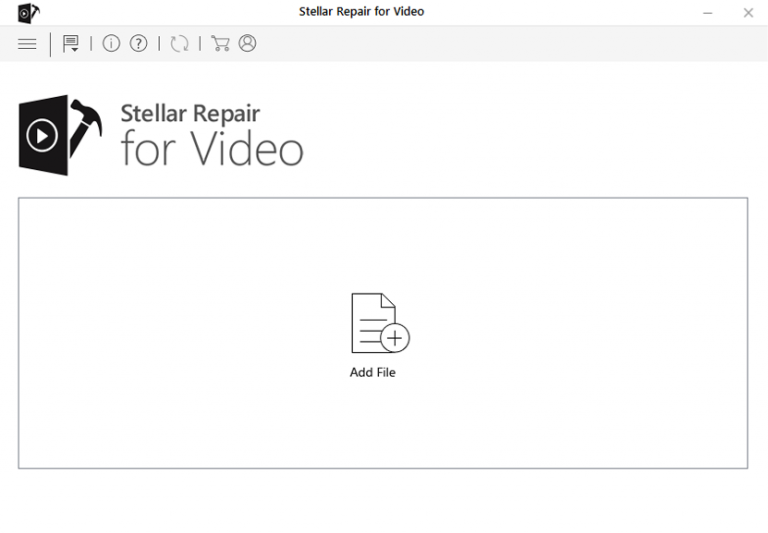
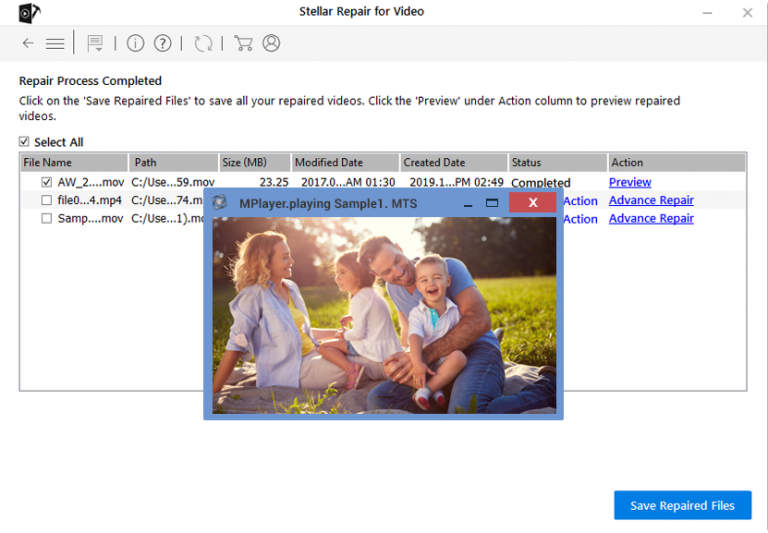
Step 1: Download, install and launch Video Repair software on your system. Click on 'Add Files' to add corrupted video files.
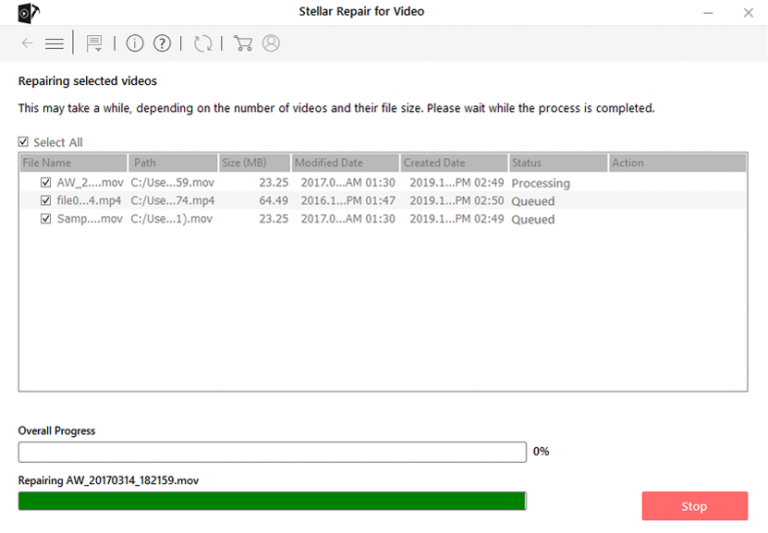
Step 2: Click on 'Repair' button to begin the repairing process. This start repairing your added video files one by one.
Step 3: You can click on 'Preview', in order to preview the repaired video file within the software and click on 'Save Repaired Files' button to save the repaired videos at desired location.
Also Read – How to Fix a Pixelated Video and Improve Quality?
Frequently Asked Questions
Does Exporting A Video Twice Lose Quality?
If you are exporting the same video twice, the video will not loses its quality. However, if you have exported the file then loaded it again into Premiere, any changes made or added something & export it again then possibly your video will lose its quality. Since you’re double compressing the video parts that you have previously exported.
Why Does My Video Look Blurry After Export?
Problems with the image softness is often caused due to compression that usually takes place just after transcoding images to your system. If you’re using the full resolution PNG or JPEGs images, then the resolution might be too large that squished during the compression. That is why, your video looks blurry after export.
How Do I Export A Video With Good Quality?
Here is the perfect export settings for exporting a good quality videos in all apps:
- Format: H. 264 (. mp4)
- Level: 4.2 (5.2 for 4K)
- Frame size: 1920 x 1080 for HD, 3840 x 2160 for 4K.
- Frame rate: Match the frame rate of the source video.
- Performance: Hardware encoding.
- Profile: High.
- Aspect: Square pixel.
- Field order: Progressive.
Conclusion
I hope, after going through this post, you will definitely able to fix video quality loss after export issue. All the methods are very effective so you can try any of them according to your need and situation.
However, in case of video corruption issue you can simply choose the best Video Repair Tool. This tool will help you to resolve all kinds of video related issue.
Hope you find this post helpful……!


Taposhi is an expert technical writer with 5+ years of experience. Her in-depth knowledge about data recovery and fascination to explore new DIY tools & technologies have helped many. She has a great interest in photography and loves to share photography tips and tricks with others.